Mastering the Russound D850 Amplifier: Your Ultimate Guide to Speaker Connectors & 12-Gauge Wire Integration
The Russound D850 Eight-Channel Digital Amplifier represents a significant leap forward in multi-zone audio power, combining Russound’s decades of installer-focused design with cutting-edge Class D efficiency. A critical, yet often under-discussed, aspect of maximizing this amplifier’s potential lies in understanding its Russound D850 Amplifier Speaker Connector for 12 Gauge Wire capabilities and limitations. This comprehensive guide dives deep into the connector specifications, the rationale behind wire gauge selection, and provides professional solutions for optimal integration, ensuring your installation delivers pristine sound reliably for years.

Understanding the Russound D850’s Speaker Connection System
The D850 features detachable speaker terminals designed for robust and flexible multi-zone installations. Each of its eight amplifier channels (organized into four independently configurable stereo zones) is equipped with its own set of terminals.
- Terminal Type & Physical Design:
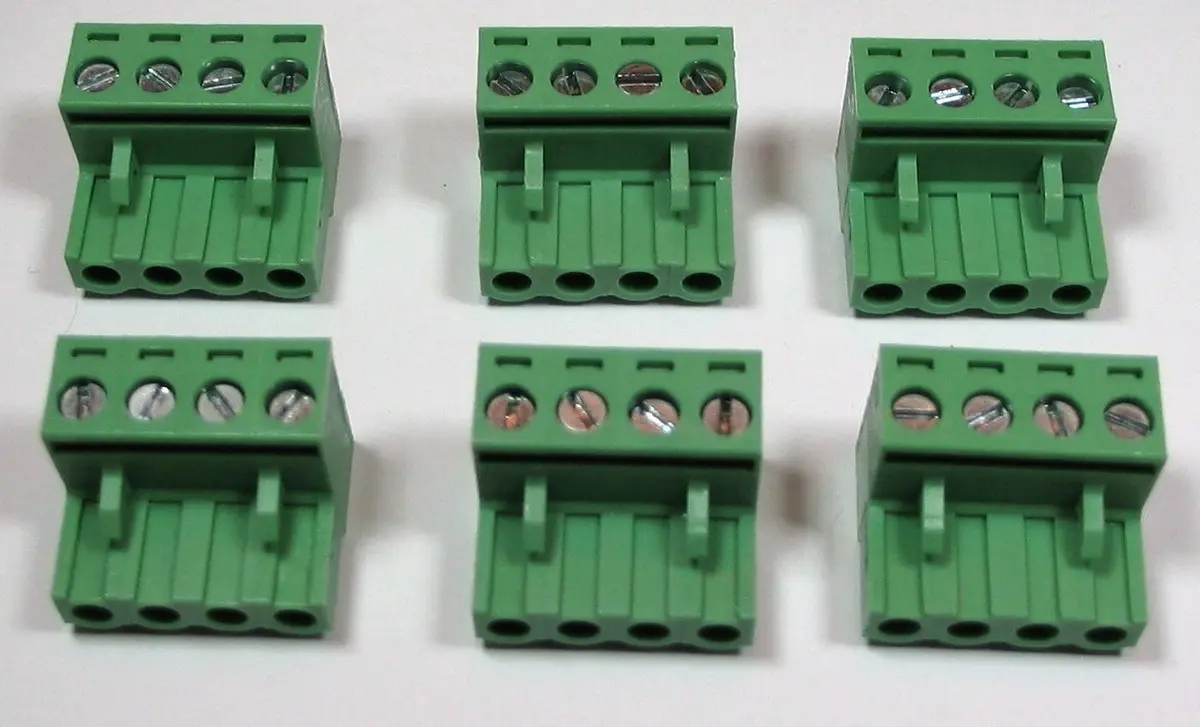
- The D850 utilizes binding post speaker terminals. These are industry-standard connectors featuring a plastic housing, a colored collar (typically red for positive/+, black for negative/-), and a central post with a threaded shaft and a knurled nut.
- The terminal design includes a hole drilled through the center post. This allows for two connection methods: inserting bare wire or a spade lug into the hole before tightening the nut, or wrapping the wire around the post itself under the loosened nut (less common with thick gauges).
- Official Wire Gauge Specification:
- Russound explicitly states the terminals support wire up to 14 AWG (American Wire Gauge). This specification is crucial for installers planning their cable runs and terminations.
Why 12-Gauge Wire? The Science Behind the Gauge
While the D850’s terminals are rated for 14 AWG, there are compelling reasons why installers frequently seek to use 12-gauge speaker wire, especially in demanding scenarios:
- Lower Electrical Resistance: The primary advantage of thicker wire (lower AWG number) is reduced electrical resistance over distance. 12 AWG wire has significantly less resistance per foot than 14 AWG or smaller gauges.
- Minimizing Power Loss (I²R Losses): Power loss in speaker wire is proportional to the square of the current (I) flowing through it multiplied by the wire’s resistance (R). Higher power levels (like those delivered by the D850, especially in bridge mode) or longer cable runs demand thicker wire to minimize these “I²R” losses. Using 12 AWG ensures more amplifier power actually reaches the speakers, translating to better dynamics and headroom.
- Maintaining Damping Factor: Amplifier damping factor (its ability to control speaker cone movement) is degraded by series resistance in the speaker cable. Thicker 12 AWG wire preserves a higher damping factor over distance compared to 14 AWG, leading to tighter, more controlled bass response.
- Essential for Long Runs & High Power: For cable runs exceeding 50 feet, or when driving demanding speakers at high volumes, or especially when utilizing the D850’s bridge mode (combining two channels to deliver 160W into 8 Ohms per zone), 12 AWG becomes highly recommended, if not essential, to preserve audio fidelity and system efficiency.
The Challenge: Integrating 12-Gauge Wire with the D850 Connector
The core challenge arises directly from the specification: The binding post terminals on the Russound D850 are physically designed to accept wire up to 14 AWG. Attempting to connect thicker 12 AWG wire presents physical obstacles:
- Physical Size Mismatch:
- 12 AWG wire has a larger diameter than 14 AWG. The hole through the center post of the D850’s binding post is sized for 14 AWG maximum.
- Result: It is often physically impossible to insert the bare end of a 12 AWG wire into the center hole of the binding post.
- Securing Under the Nut:
- While wrapping wire around the post under the nut is possible, the increased diameter and stiffness of 12 AWG wire make it difficult to wrap neatly and securely fit under the binding post nut designed for smaller gauges.
- Result: An insecure connection, increased risk of stray strands causing shorts, and difficulty achieving proper torque on the nut.
Professional Solutions for Connecting 12-Gauge Wire to the Russound D850
Don’t let the 14 AWG rating deter you from using the superior 12 AWG wire where needed. Professional installers employ these reliable techniques:
- Solution 1: Pigtailing with High-Quality Spade Lugs (Recommended & Most Secure)
- Concept: Terminate the 12 AWG speaker wire run with a high-quality, insulated spade lug (fork terminal) rated for 12 AWG wire.
- Execution:
- Strip the 12 AWG wire to the length specified by the spade lug.
- Insert the bare wire into the barrel of the lug and crimp it securely using a ratcheting crimping tool designed for the lug size. A proper crimp is essential for a gas-tight, low-resistance connection. Solder can be added after crimping for extra security if desired (avoid solder-only connections).
- Slide the spade lug’s fork end over the threaded shaft of the D850’s binding post.
- Tighten the binding post nut securely down onto the spade lug. Ensure the lug is fully seated and cannot rotate.
- Advantages: Creates a robust, reliable, and vibration-resistant connection. Utilizes the binding post as intended. Easier to connect/disconnect. Maintains wire gauge integrity for the main run.
- Recommended Lug Type: Use fully insulated, color-coded spade lugs (Red for +, Black for -) with a ¼” (6.35mm) or 5/16″ (7.94mm) fork opening (verify post diameter compatibility). Ensure the lug barrel is rated for 12 AWG.
- Solution 2: Precision Bare Wire Termination (Requires Care)
- Concept: Carefully prepare the end of the 12 AWG wire to maximize its ability to fit under the binding post nut, without using the center hole.
- Execution:
- Strip only the minimum amount of insulation needed – approximately ¾” (19mm).
- Twist the Strands TIGHTLY: Use linesman’s pliers to twist the exposed copper strands into a very tight, compact bundle with no stray wires.
- Tinning (Optional but Recommended): Apply a small amount of electronics-grade solder to the twisted end. This “tins” the strands, bonding them together into a solid, easier-to-handle mass and preventing oxidation. Crucially, use solder sparingly – you want to bind the strands, not create a large solder blob.
- Loosen the binding post nut sufficiently.
- Wrap the prepared, tinned (or very tightly twisted) wire end clockwise around the threaded binding post shaft, ensuring it sits below the nut’s seating surface. Aim for at least ¾ of a turn.
- While holding the wire firmly in place, tighten the binding post nut securely. The goal is for the nut to clamp down directly onto the solid copper bundle.
- Advantages: Avoids additional components (lugs). Direct wire-to-post connection.
- Disadvantages: More time-consuming. Requires meticulous preparation to avoid stray strands. Risk of an imperfect connection if not done perfectly. Less secure than a lug against vibration. Only recommended if lugs are absolutely not an option.
- Solution 3: Banana Plug Adapters (Use with Caution)
- Concept: Some binding posts (including potentially the D850’s) have a removable plastic cap or plug in the end of the center post. Removing this cap reveals a hole designed to accept a banana plug.
- Execution:
- Check if the center post cap can be unscrewed or pulled out. Not all binding posts have this feature; consult the D850 manual or physically inspect.
- If present, remove the cap.
- Terminate the 12 AWG wire with a high-quality banana plug rated for 12 AWG wire. This typically involves stripping, inserting into the plug barrel, and crimping/screwing it secure.
- Insert the banana plug firmly into the hole in the end of the binding post.
- Advantages: Very quick and easy connection/disconnection. Neat appearance.
- Disadvantages:
- Critical Check: Verify if the D850 posts actually accept banana plugs. Russound documentation doesn’t explicitly mention it for the D850 terminals. Do not force plugs if no hole exists.
- Quality banana plugs rated for 12 AWG can be bulky.
- Some argue banana plugs offer marginally higher resistance than a well-made spade lug or bare wire connection (though often negligible in practice).
- Less mechanically secure than a spade lug under the binding post nut.
Best Practices for Secure & Optimal Connections (Regardless of Gauge)
- Torque Matters: Always tighten binding post nuts firmly by hand. Overtightening can damage the terminal or strip threads. Undertightening leads to high-resistance connections, potential arcing, and overheating. A snug, secure fit is key.
- Polarity is Paramount: Double-check that positive (+) from the amplifier connects to positive (+) on the speaker, and negative (-) to negative (-). Reversed polarity in one speaker of a stereo pair causes significant audio degradation (phase cancellation).
- Strand Management: With bare wire connections (even using lugs), ensure no stray copper strands are protruding. These can cause dangerous shorts to adjacent terminals or the amplifier chassis. Trim any stray strands meticulously.
- Zone Configuration Awareness: Remember the D850’s zones are bridgeable. If bridging two channels for a single zone (outputting 160W @ 8 Ohms), ensure you connect the speaker to the correct pair of terminals (usually Channel A + and Channel B +, with the jumpers set correctly per the manual). Using appropriately sized wire (like 12 AWG) is especially critical for bridged zones due to the higher power delivery. Never bridge into loads below 8 Ohms.
Why Russound Specifies 14 AWG Max & When to Stick With It
Russound’s 14 AWG maximum rating for the D850 terminals is based on the physical dimensions of the binding post hole and the typical needs of average installations.
- Adequate for Many Scenarios: For relatively short speaker cable runs (under 30-50 feet), moderate listening levels, and speakers with average sensitivity (efficiency), 14 AWG wire is perfectly adequate and will connect easily to the D850 terminals without modification. It meets electrical requirements for these common situations.
- Focus on Ease of Installation: Recommending 14 AWG simplifies the installation process for users who don’t require the benefits of 12 AWG, ensuring a straightforward, tool-free connection using the center post hole.
Conclusion: Empowering Your D850 Installation with the Right Wire & Connection Strategy
The Russound D850 amplifier is a powerhouse for distributed audio, but unlocking its full potential demands careful attention to speaker wiring. While its binding posts are physically rated for up to 14 AWG wire, the compelling electrical advantages of 12-gauge speaker wire – especially for long runs, high-power zones, or bridged configurations – make it a desirable choice for professional and high-performance installations.
By employing the professional techniques outlined – primarily pigtailing with high-quality 12 AWG spade lugs – you can seamlessly and securely integrate 12-gauge wire with the D850’s connectors. This ensures minimal power loss, optimal damping factor, and the clean, dynamic sound the amplifier is capable of delivering, all while maintaining a robust and reliable connection. Whether tackling a simple multi-room setup or a demanding home theater integration, understanding and implementing these Russound D850 Amplifier Speaker Connector for 12 Gauge Wire solutions is fundamental to a successful, high-fidelity installation. Prioritize secure terminations, correct polarity, and the appropriate wire gauge for each zone’s specific requirements, and your Russound D850 system will deliver exceptional performance for years to come.